Learn How to Make Labels on Canva to Sell on Etsy
Ever wondered why some products seem to jump off the shelves while others linger unnoticed? Often, it’s all about the label. An attractive, eye-catching product label can make all the difference in a competitive market.
But what if you’re not a graphic designer? No worries! Canva, a user-friendly graphic design tool, is here to save the day. In this article, I’ll guide you through the simple steps on how to make labels on Canva, ensuring your products stand out and capture the attention they deserve.
This post may contain affiliate links. This means I get a commission if you purchase through my links at no extra cost. Read the full disclosure here.
Some key facts to keep in mind when creating product labels
They need to attract attention: A well-designed label grabs the attention of potential customers, making them more likely to pick up the product and take a closer look.
They communicate all the key information: Labels provide essential information about the product. How you design this information can influence buying decisions.
Brand identity: Your label is a powerful branding tool. Consistent, appealing labels reinforce your brand and build customer loyalty.
Why create product labels on Canva?
Learn how to use canva with this in-depth tutorial
How to Design Product Labels in Canva
Ready to start designing? Let’s walk through the process of how to make labels on Canva step-by-step.
How to Make Labels on Canva?
Creating a professional-looking product label in Canva is easier than you might think! Today, I’ll guide you through the process step-by-step, from measuring your container to setting up your file for print. So, grab your tape measure, and let’s get started on designing a standout label for your product!
Setting Up Your Project.
1. First, access Canva by signing up or logging in.
2. Choose or create a custom size that fits your product package.
Step 1: Measure Your Container
Before anything else, you need to determine the correct label size for your container. Decide whether you want your label to wrap around the entire container or just cover the front. If you need a bit more guidance on how to do this effectively, check out this helpful post with a video from OnlineLabels.com.
Step 2: Set Up Your Canva Design
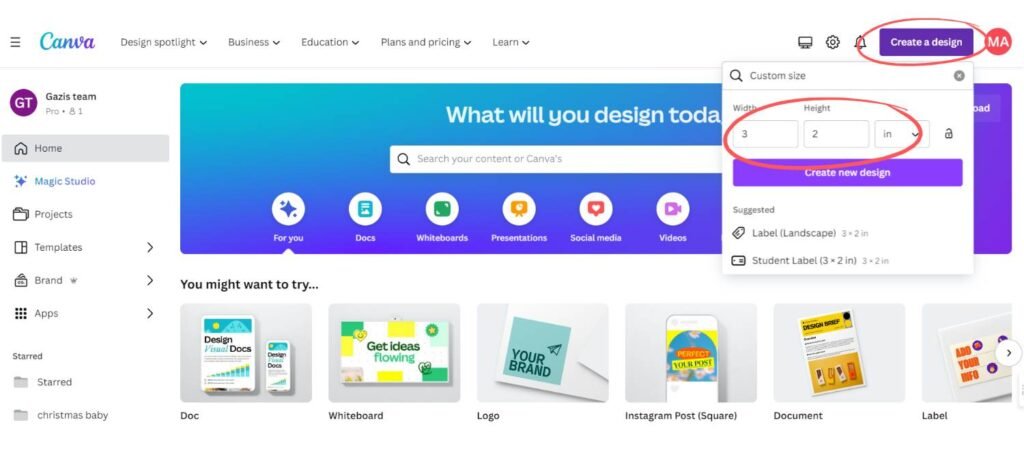
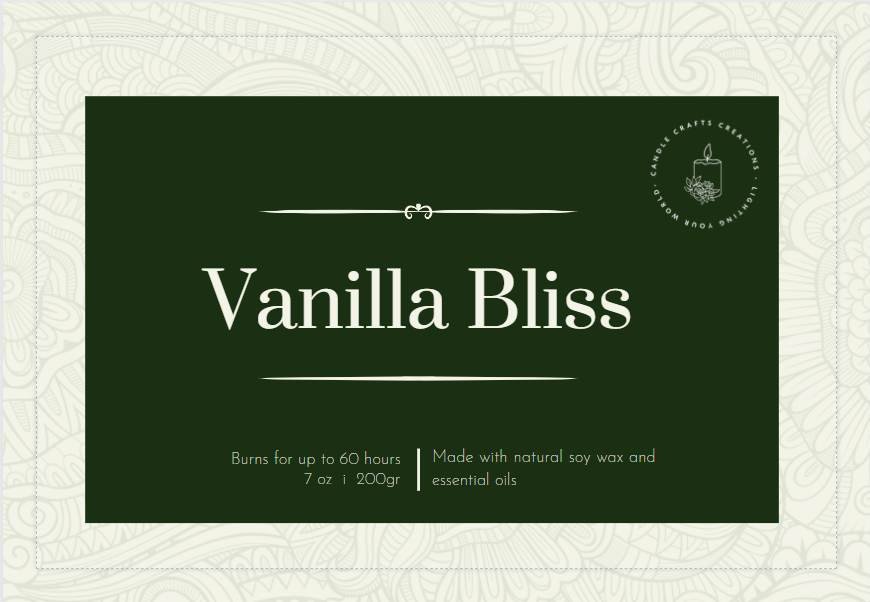
Let’s start by opening Canva and creating a design. Choose ‘Custom size’ and set the unit of measurement to what you use in your country. If you’re in the U.S., I recommend using inches. I set the dimensions for this candle label design to 3 inches by 2 inches. After setting your dimensions, click ‘Create new design.’
Adding Margins and Bleeds
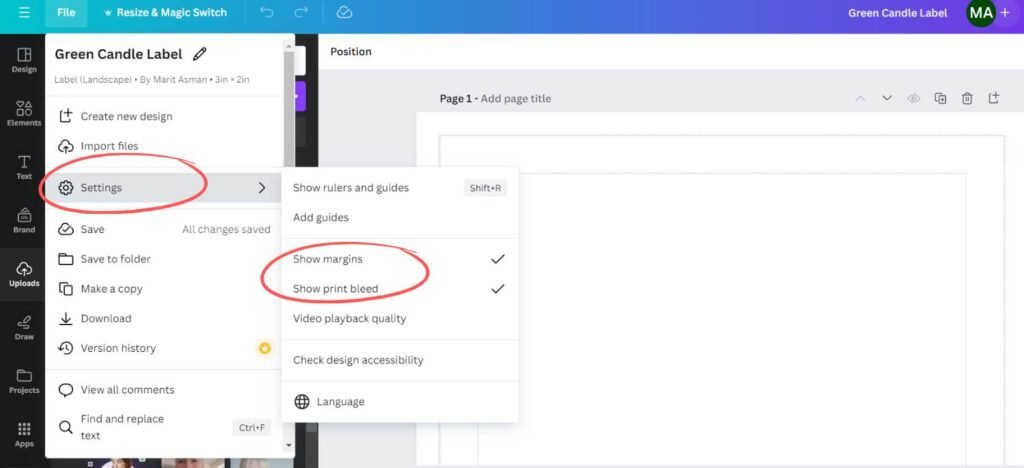
To ensure all crucial details of your label are safely within the printable area, go to ‘File’ and select ‘Show margins’ and ‘Show bleeds.’ Margins define the safe area, ensuring nothing important gets cut off during printing. The bleed is an extension of your design past the final trim size, which helps avoid unprinted edges on your final label.
Another option is Choosing a Template
Explore Canva’s extensive library of label templates and design elements to discover endless possibilities for how to make labels on Canva. Pick one that aligns with your product and brand.
Having selected a template, you can personalize it by adding your brand colors, logo, and the necessary text.
Step 3: Design Your Label
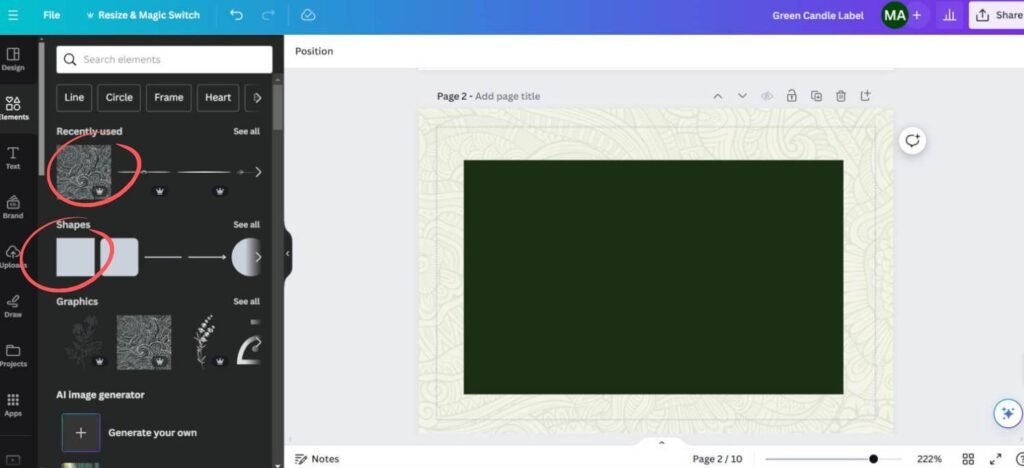
Add a solid rectangle from the ‘Elements’> ‘Lines and Shapes’ menu. Adjust the size by dragging the corners, and then change the color to match your brand. If you have a custom hex code, you can add one. If you wish, you can add a stylish background like I did in the example. Lower the opacity to make it look more subtle.
Incorporate Your Branding
Upload your logo by selecting ‘Uploads’> ‘Upload file’ and adding it to your canvas. I will include the company’s logo using a PNG file I created and uploaded again into Canva for this design. Adjust the size and placement until you’re satisfied with how it looks. Creating a product label that captures attention and conveys your brand’s message effectively is both an art and a science.
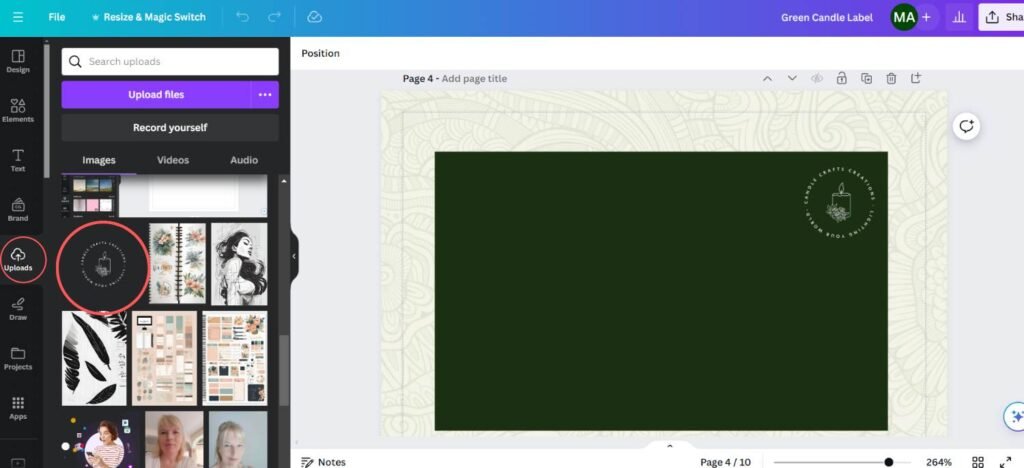
Step 4: Add Text and Graphics
Go to the ‘Text’ tool to add the product name and click ‘Add a heading.’ Next, you can change the font to one that suits your brand and adjust the size for clarity and aesthetic appeal.
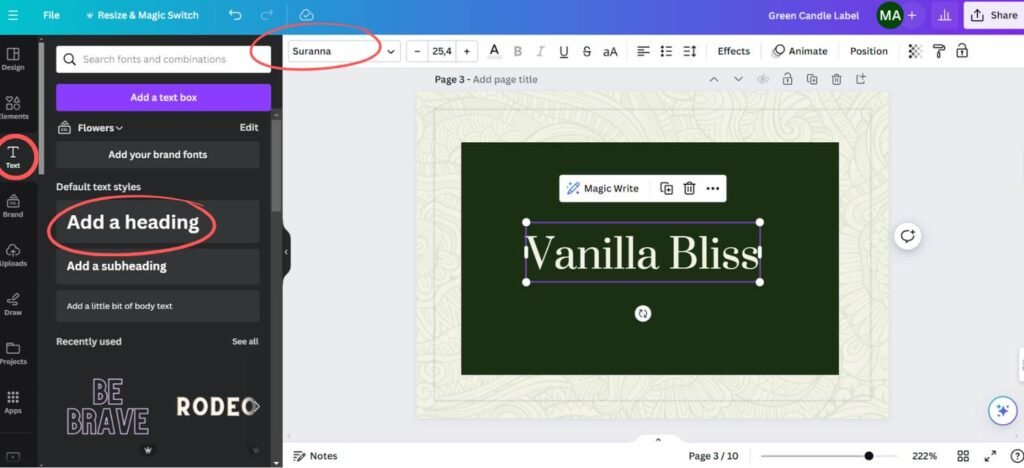
Additionally, you can add a subtle graphic element. Choose one from Canva’s library or upload a custom graphic just like you did with the logo. Place it into your design, adjust it, and set the transparency to about 10% to keep it subtle yet enhancing.
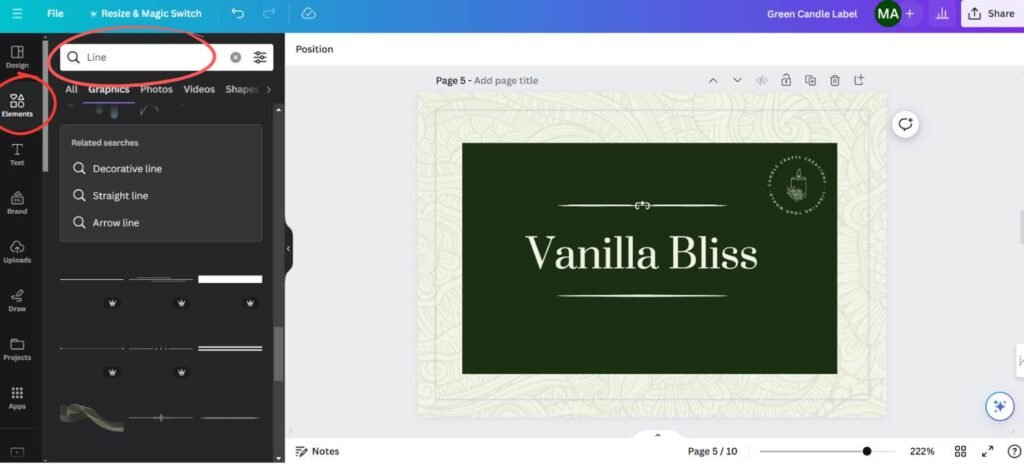
To make it stand out more, I added two dividers above and under the text in this soap label tutorial.
Step 5: Highlight Key Selling Points
Add a few key selling points by selecting ‘Text’> ‘Add a subheading.’ Update the fonts and colors to keep the style consistent. Use commands (Ctrl or Cmd + C, Ctrl or Cmd + V) to duplicate text boxes for uniformity. Add a dividing line between sections by searching for ‘line’ in the ‘Elements’ tab. Adjust the line’s width and color to fit your design.
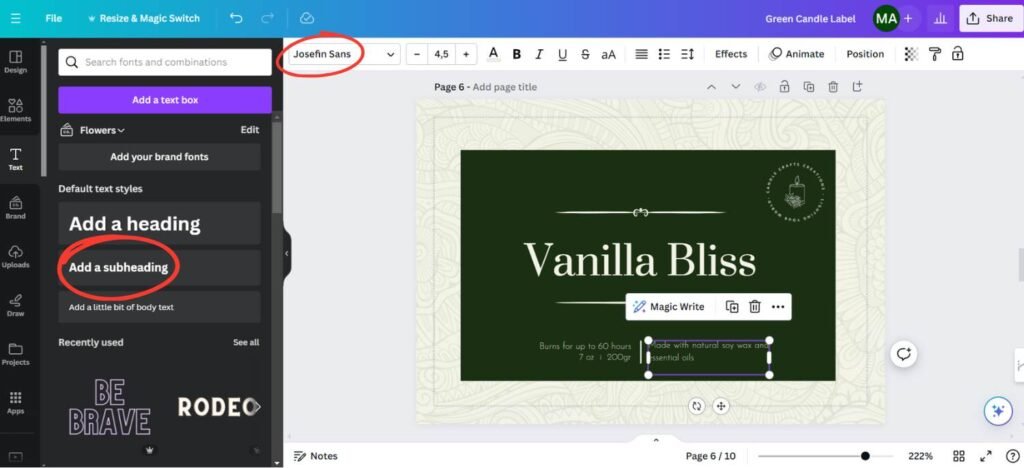
But I can hear you say; How do I design a product label that stands out?
To design a standout label, think about what makes your product unique and how your label can reflect that uniqueness. You can add elements that can catch the eye from a distance, such as:
Bold Typography: Use bold and large fonts to highlight the name or key features of the product.
Contrasting Colors: High contrast between elements can make your label more readable and more visually striking.
Unique Shapes or Cuts: Consider die-cut labels that go beyond standard rectangles to intrigue customers.
Step 6: Finalize and Download
Now, add any additional details like product volume or weight. Once your design is complete, it’s time to export. Click the ‘Share’ button, select ‘Download,’ choose ‘PDF Print,’ and make sure to include ‘Crop Marks and Bleeds.’ Hit ‘Download,’ and you’re done! We’ve just created a label that is ready to be sent off for printing or to sell on Etsy!
Best Practices for Label Design
To ensure your labels are as effective as possible, consider these tips:
Read also: How to Make a Background Transparent in Canva (Step-by-Step Guide!)
What are the best color schemes for product labels?
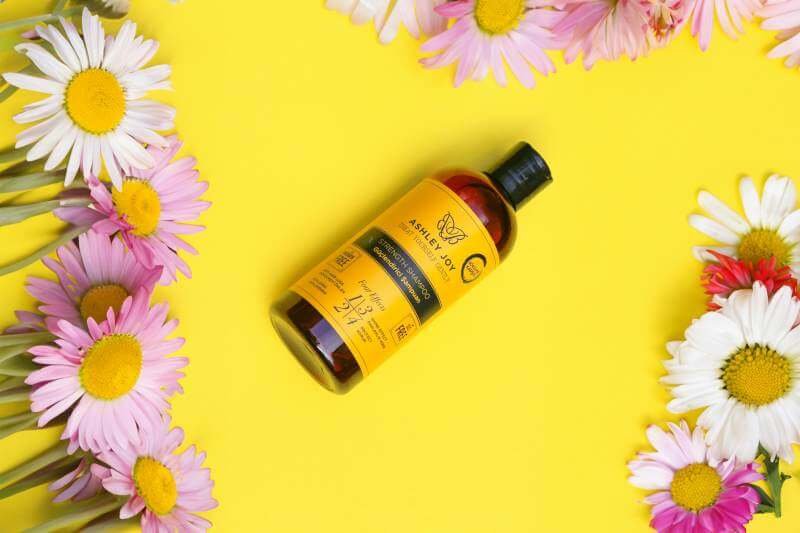
As colors can drastically affect consumer perception, choosing the right color scheme is crucial. Here’s how to select an effective palette:
Target Audience: Consider the preferences and emotions of your target demographic. For instance, vibrant colors attract younger consumers, while earth tones appeal to eco-conscious shoppers.
Product Type: Align colors with the product type. For example, greens and naturals are used for organic or health products, and bold and bright colors are used for toys and entertainment.
Visibility: Ensure your chosen colors stand out on store shelves and work well in online thumbnails.
How do I choose the right font for my product label?
The right font not only conveys the information clearly but also enhances your brand personality. Here’s what to consider:
Legibility: Above all, the font should be easy to read in various sizes. Avoid overly decorative fonts for critical information.
Brand Consistency: Choose a font that aligns with your brand’s character—whether it’s professional, whimsical, or rustic.
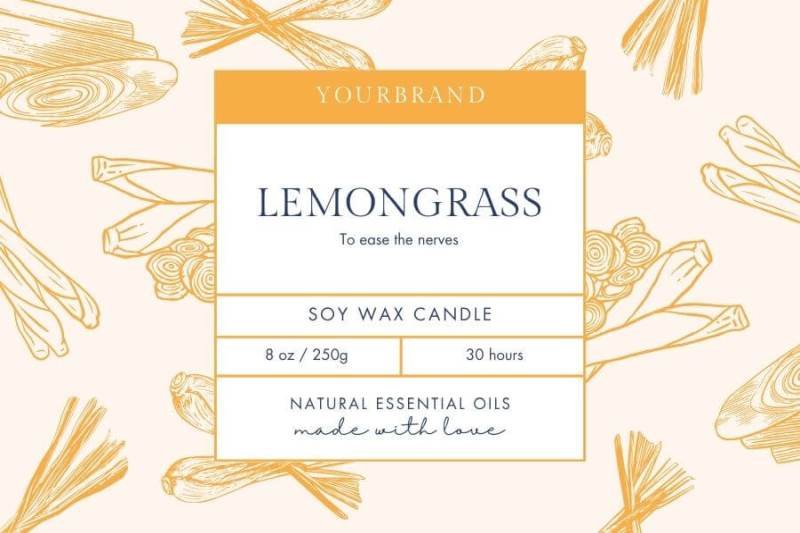
Font Pairing: Combining fonts can be effective, but limit yourself to two to avoid cluttering the label.
How can I use images or graphics effectively on labels?
Images and graphics can tell a story much faster than words. To use them effectively:
Relevance: Images should directly relate to the product or your brand’s values. For instance, a jam label’s image of ripe berries quickly conveys the flavor and freshness.
Quality: Always use high-resolution images to avoid any printing issues that can make the labels look unprofessional.
Balance: Balance text and images so that neither overwhelms the other. The graphics should complement—not overpower—the text.
By paying close attention to these aspects of label design, you can create a product label that complements the product it adorns. Always create prototypes and test different designs to see which resonates best with your target audience. Keep tweaking until you find that perfect balance that speaks to your customers and enhances your product’s shelf appeal.
By following these step-by-step instructions on how to make labels on Canva, you can unleash your creativity and design the most amazing labels.
Learn how to use canva with this in-depth tutorial
Adding Finishing Touches
Review Your Design: Take a step back and look at your label. Ensure everything is balanced and aligned.
If you want to make sure your label is on target, why not ask your peers or potential customers for feedback? That way, you can make any necessary adjustments after hearing their feedback. It’s always great to get a second opinion.
Where to Sell the Product Labels You Designed in Canva
Have you ever wondered what to do with those stunning product labels you’ve just created in Canva?
Choosing the right platform for selling digital items can make all the difference if you plan to sell your label designs. Here are some top places to consider:
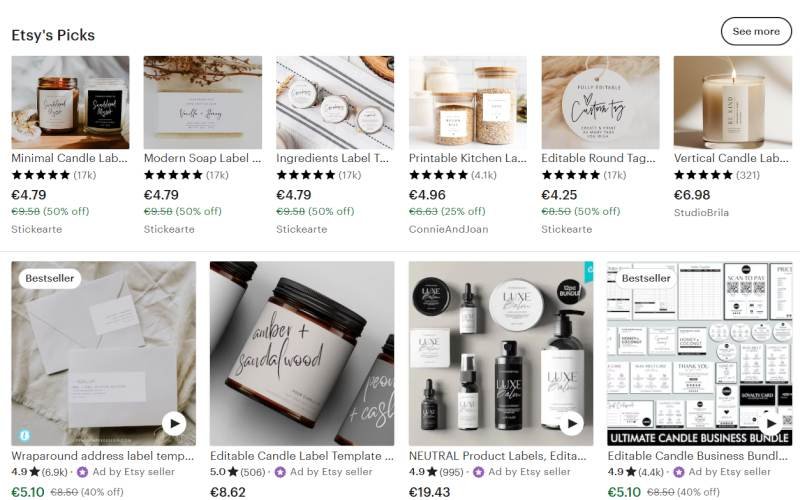
Etsy
eBay
Amazon
Creative Market
Tips for Successful Selling
To ensure your label designs stand out and sell well, follow these tips:
Quality Images: Use high-quality images of your labels. If possible, show them applied on products to give a better idea of the final look.
Clear Descriptions: Write clear and detailed descriptions for your listings. Include applications, dimensions, and customization options.
Pricing Strategy: Research your competition to set competitive prices. Consider offering bundles or discounts on multiple purchases.
How To Promote Your Labels?
If you want to get more people to check out your listings, you gotta promote them! You can use social media platforms like Instagram, Pinterest, and Facebook to show off your designs and get the word out there. You might also want to consider:
Conclusion
Selling your product labels can be a rewarding and profitable endeavor. By choosing the right platform to sell your labels and using effective marketing strategies, you can turn your Canva creations into a successful business. So why not start today? Set up your online shop, list your designs, and watch as your creations help bring other businesses to life. Remember, every great product deserves a great label, and yours could be just what someone is looking for.
And that’s all there is to it! I hope this detailed tutorial on exactly how to make labels on Canva will help you create professional-looking designs. If you have any questions, please drop them in the comments below.
